Outdoor Portrait Photography Tips
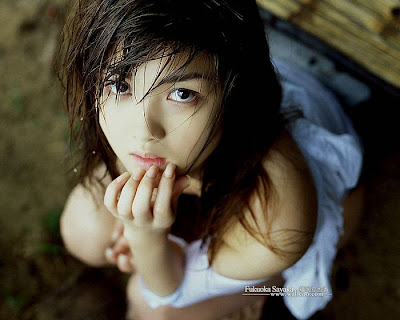
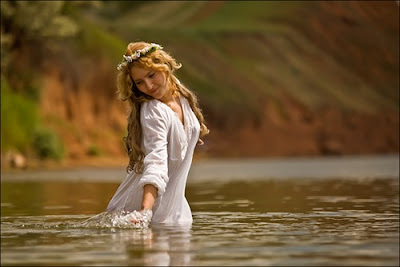
အခုေနာက္ပိုင္းကာလ မွာေခတ္စားလာတာကေတာ႔ပါ႔ထရိတ္ဆိုတဲ႔ အလွပုံရိုက္တာပါပဲ။ Portrait ေတြထဲက အခုကြ်န္ေတာ္ outdoor portrait အေၾကာင္းေလးကို ဘာသာျပန္ဖို႔ စိတ္၀င္စားလာပါတယ္။ထိလဲထိေရာက္ မွတ္သားရတာလဲလြယ္ကူႏိုင္တာမို႔ အနည္းအမ်ားဆိုသလို အေထာက္အကူျဖစ္ႏိုင္ေလာက္ပါတယ္။ မွတ္ထားရတာလဲလြယ္ကူတယ္ ၊ ခရီးသြားရင္း အေပ်ာ္ရိုက္ၾကတာမ်ိဳး တို႔ ၊ သစ္ရြက္ေလးေတြ ေၾကြက်လာတာမ်ိဳးတို႔ ကေလးေတြကစားေနတာေတြဟာ ကြ်န္ေတာ္တို႔ပတ္၀န္းက်င္မွာ အျမဲၾကံဳေတြျပီး လြယ္လြယ္ကူကူရိုက္လို႔ ရတဲ႔အမ်ိဴးအစားေတြပါပဲ။ အခု ေအာက္မွ Outdoor Portraits အတြက္ အလြယ္တကူ Tips ေလးေတြကို မွ်လိုက္ရျပန္ပါတယ္။
Turn your Flash on
အရိုက္ခံမယ္႔ သူဟာ အမ်ားဆံုး ၁၅ ေပအတြင္းမွာရွိေနမယ္ဆိုရင္ ၊ Harsh Shadows ေတြနည္းေနျပီဆိုရင္။ ဒါမွမဟုတ္ ေန ကိုမ်က္ႏွာျပဳျပီးရိုက္ေတာ႔မယ္ဆိုရင္ Flash ကိုဖြင္႔ျပီးရိုက္သင္႔ပါတယ္လို႔ေျပာထားပါတယ္။ သည္လိုမွလဲ လူေတြရဲ႔မ်က္ႏွာကို ျမင္ရျပီး မဲ မေနမွာပါတဲ႔။ သည္လို႔ Flash ကိုဖြင္႔ရိုက္တဲ႔ေနရာမွာ သတိထားဖို႔ တစ္ခ်က္က 'Red Eye Deduction' Flash ရိုက္လိုက္တဲ႔အခ်ိန္မ်က္လံုးေတြနီမသြားေအာင္ လုပ္ေပးတဲ႔ Function ကိုဖြင္႔ထား မထား စစ္ဖို႔သတိေပးခ်င္ပါတယ္။ အထူးသျဖင္႔ ကမ္းေျခလို ညေန ေန၀င္ခ်ိန္မ်ိဳးမွာ ရိုက္တဲ႔အခါ ေနာက္ခံ ေနလံုးကိုလဲေပၚခ်င္တယ္၊ ေရွ႔လူကိုလဲ ထင္ထင္ရွားရွားျဖစ္ေနခ်င္ရင္ေတာ႔ Flash ဟာအေကာင္းဆံုးပါပဲ အကယ္လို႔ ရိုက္တဲ႔အခါမွာ ေသျခာမေပၚဘူးစိတ္တိုင္းမက်ဘူးဆိုရင္ေတာ႔ Shutter speed ကို အေႏွးအျမန္ လုပ္ခ်င္းေသာ္လည္ေကာင္း ဒါမွမဟုတ္ လူကို ေရွ႔တိုးေနာက္ဆုတ္လုပ္ျပီး လိုအပ္တဲ႔ အေနအထားရေအာင္ေရႊ႔ယူရင္ျဖင္႔ေသာ္လည္ေကာင္း လုပ္လို႔ရပါတယ္။
Shoot on a cloudly day
လူအလွပံုေလးေတြရိုက္ဖို႔ ဘယ္အခ်ိန္အေကာင္းဆံုးပါလဲ? ကန္႔သတ္အခ်ိန္အားျဖင္႔ မနက္ ၁၀နာရီမေက်ာ္ခင္နဲ႔ ညေန ၂နာရီေနာက္ပိုင္းအခ်ိန္ေတြဟာ Portraits ေတြရုိက္ဖို႔ အေကာင္းဆံုးအခ်ိန္ေတြပါ။ ဘာျဖစ္လို႔လဲဆိုေတာ႔ ၁၀ကေန ၂ နာရီၾကားေလာက္မွာ ေနဟာ ဦးေခါင္းတည္႔တည္႔ေရာက္ေနလို႔ပါ။ မ်က္ႏွာကို တိုက္ရိုက္ ေရာင္ျပန္ အရိပ္ေတြ က်ေရာက္နိုင္တာမို႔ အမည္းကြက္ေတြျဖစ္ေပၚတတ္ပါတယ္။ သည္လိုအခ်ိန္မ်ိဳးမွာ အေျခအေနအရ ရိုက္မယ္ဆိုရင္ေတာ႔ reflector ေတြကိုသံုးျပီး အရိပ္က် ေနရာေတြကို ေဖ်ာက္ျပီးရိုက္ရင္ေတာ႔အဆင္ေျပပါတယ္။ တိမ္ရွိေနတဲ႔ေန႔တစ္ေန႔ဆိုရင္ေတာ႔ အလြန္ေကာင္းတာေပါ႔ေနာ္။ ေနရဲ႔အလင္းဟာ တိမ္ကို ေဖာက္၀င္တဲ႔အခ်ိန္မွာ သဘာ၀ diffuser အေနနဲ႔အလင္းေတြဟာ လူရဲ႔ ကိုယ္ေပၚကို က်ေရာက္မွာျဖစ္တာမို႔ အရမ္းလွတဲ႔ ပံုေလးေတြကိုရလာမွာျဖစ္ပါတယ္။
Use a medium telephoto lens
ပံုမွန္ ေပါ႔ထရိတ္ပံုအေနနဲ႔သာရိုက္မယ္လို႔ စိတ္ကူးထားမယ္ဆုိရင္ေတာ႔ zoom lens ကိုသံုးသင္႔ပါတယ္ေျပာပါတယ္။ 80-135mm range အမ်ားဆံုးသံုး ျပီးရိုက္သင္႔တယ္လုိ႔ စာေရးသူက ေျပာျပထားပါတယ္။ ဘာလို႔လဲဆိုေတာ႔ အဲ႔သည္႔ range lens ေတြသံုးမယ္ဆိုရင္ ႏွာေခါင္းၾကီးသြားတဲ႔ ျပသနာေတြ နားရြက္ ၾကီးေနတာေတြ စတဲ႔ျပသနာေတြက သက္သာတယ္ လို႔လဲေျပာထားတာကိုေတြ႔ရပါတယ္။ ကို႔ယ္ရဲ႔ subject ကို အသားေပးတဲ႔ ပံုျဖစ္ဖို႔အတြက္ကေတာ႔ ရိုးရွင္းတဲ႔ ေျဗာင္ နည္းပါးရွိတဲ႔ background ကိုသံုးတာဟာအေကာင္းဆံုး ၊အသင္႔ေတာ္ဆံုး ပါ။ ဒါမွလဲ ကိုျပခ်င္တဲ႔ လူဟာ ထင္ထင္ရွားရွားပံုထဲမွာ ေပၚထြက္လာမွာျဖစ္ပါတယ္။ ေနာက္တစ္ခုက Rule of Thirds ကိုသံုးျပီး တစ္ဘက္ဘက္ကိုေထာင္႔ ကပ္ေပးလိုက္ရင္လဲ သိသိသာသာ ေပၚလာမယ္လို႔လဲဆိုထားပါတယ္။
Show the Action
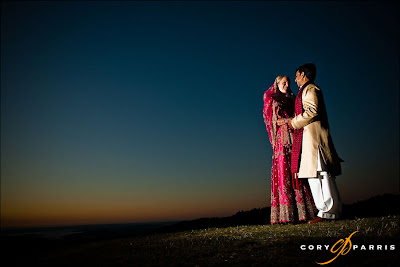
သက္၀င္ လွဳပ္ရွားေနတဲ႔ ပံုေလးေတြျဖစ္ဖို႔အတြက္ကေတာ႔ တစ္ခုခုစကားေျပာလိုက္တာမ်ိဳး ၊ ေက်ာက္ခဲကို ေရထဲပစ္ခိုင္းလိုက္တာ ေရကိုလက္နဲ႔ထိခိုင္းတာ ေၾကာင္ ေခြး စတဲ႔အေကာင္ေပါက္ေလးေတြနဲ႔ ေဆာ႔တာမ်ိဳးေလးေတြက သဘာ၀ ပိုက်ျပီး ခ်စ္ဖုိ႔ေကာင္းတဲ႔ ပံုေလးေတြ ျဖစ္လာမွာ ရလာမွာလို႔လဲ ရွင္းျပထားပါတယ္။
ေနာက္ဆံုးအေနနဲ႔ သတိထားရမွာကေတာ႔ အလင္းေရာင္ျဖစ္ပါတယ္။ အလင္းရဲ႔အေနအထားကိုလိုက္ျပီး ISO Levels ကို အမ်ိဳးမ်ိဳးအသံုးခ်သြားဖို႔လိုပါတယ္။ ခုအမ်ားအေနနဲ႔က ISO 100 သာလ်ွင္အေကာင္းဆံုး လို႔ကြ်န္ေတာ္တို႔လက္ခံထားၾကတယ္။ သို႔ေပမယ္႔ Portraits ေတြရိုက္တဲ႔အခါမွာ တစ္ခါတစ္ေလ မ်က္ႏွာေပၚကို အရိပ္က်တာေဖ်ာက္ခ်င္ရင္၊ ေမွာင္ေနတာမ်ိဳးေတြျဖစ္ေနရင္ ISO 100 မွ မဟုတ္ပါဘူး လိုသလို ISO Levels ကိုကစားသင္႔ပါတယ္။ ISO 200 400 800 စသည္ျဖင္႔ လိုအပ္သလို ေရႊ႔ျပီးအသံုးျပဳသင္႔ပါတယ္။ တစ္ခါတစ္ေလ ခဲျခစ္သလိုမ်ိဳး၊ Noise ေလးေတြပါေနတာမ်ိဳး ပံုေလးေတြကလဲ လူေတြရဲ႔ အျမင္ကို တစ္မ်ိဳးတစ္ဖံုဆန္းသစ္ေစတာကိုေမ႔ထားဖို႔ မသင္႔ပါဘူး။ ဒါေၾကာင္႔ Portraits outdoor မွာ ISO ကိုမေၾကာက္ပါနဲ႔ လိုအပ္သလိုအသံုးခ်ၾကည္႔ပါ။
Naing H Lwin
06/05/2011
Tuesday, April 19, 2011
Top 10 Tips to imporve Point-and-Shoot Travel Photography
Top 10 Tips to Improve Point-and-Shoot Travel Photography
by Karen M. Cheungphotography by Josh Root and Hannah Thiem
Do you flip through your photo albums and/or online gallery and sigh at the fact that all your photos look the same? The vacations all might blend together into an array of similar photos. It’s easy to fall into a rut of taking the same types of travel pictures, especially when our point-and-shoot cameras seem to do all the hard work of shooting. That’s the fun of it though. Rather than photographing the same old pictures from summers past, try out some of these improvement techniques from our top 10 tips for using your digital point-and-shoot this travel season.
1. Use the manual modes
Make the bold move to switch the camera dial from “Auto” to “Manual.” More point-and-shoot digital cameras these days come with built-in manual modes, depending on price and manufacturer. Some point-and-shoots cameras include manual features in which users can control aperture and shutter speed, features that were once only limited to higher-priced SLRs for advanced users. That isn’t the case anymore. Some point-and-shoots now carry manual functions that give users the benefit to control shooting capabilities in varied lighting and speed situations. Users can access aperture and shutter speed usually through menu settings and then via a zoom button. Although not all compact cameras have aperture and shutter speed controls, the majority of point-and-shoots include controls for ISO speed (usually 100, 200, 400, 800, 1600, and sometimes 3200), flash (On, Off, Auto, Red-eye Reduction), and sometimes exposure stops (+/- 2).Experiment with the manual modes by first playing with the menu items. Change your menu settings by pressing the zoom toggle or main four-way controller, depending on the layout for your camera. If you have more time before the trip, remove the plastic wrap from the manual guide for some light reading about your camera’s full feature set, usually listed in the index. If you’ve lost the manual, access the manufacturer website for the online version to your camera’s guide.
2. When to turn off the flash
Point-and-shoots tend to employ a flash-on setting as the default mode. For travel photography though, most situations will call for little flash compensation since most vacationers spend their time outdoors that is already well lit. Those with a traveler’s heart, though, should shut off the automatic flash or suppress the pop-up in situations with plenty of light. To turn off the flash, hit the multi-controller button marked with a lighting bolt icon, which is oftentimes the preferred method that point-and-shoots identify the flash setting. Change the “Flash On” setting to “Flash Off.” Use natural lighting shining through a window during the daytime in lieu of the flash.You can also turn off the flash for nighttime shooting. To compensate for the lack of light and flash, the camera will boost ISO or slow down the shutter speed, usually automatically, unless overridden in manual mode by the user. You might want to also use a mini travel tripod or simply set the camera to an automatic timer that is included on almost every camera for the increased time it takes to capture the night picture. Turning off the flash captures the ambient light for more natural-looking pictures.
3. When to turn on the flash
Some situations do call for the extra help of a flash such as the standard indoors settings or even outdoors in bright sun or shady days. For those outdoors situations, users should consider turning down flash to fill in for overcast or shady conditions. Not all point-and-shoots offer this adjustable feature to increase and decrease flash increments, but if your cameras does, use it. It can help properly expose your outdoor photos for even lighting.4. Remember the zoom
Do a practice run on your zoom by photographing objects like flower buds and engagement rings. Sometimes, you might notice that your point-and-shoot sets off a ”!” alert that indicates the image might be blurry. Instead of putting the lens too close to the subject, move back and then zoom in using the lens.This technique is also particularly useful for portraiture. Pulling back away from the subject allows the person to feel more relaxed for more natural smiles, but also provides less foreshortening of noses or foreheads for more realistic and prettier faces.
5. Get a new perspective
One of the easiest ways to vary your shooting involves some exercise. Photograph from below or shoot from above. Try getting down on the ground to spruce up landscape photography that can make small churches look like cathedrals. You can kneel or simply crouch similar to the way baseman empires do. Point your camera upwards to make things in the foreground appear much bigger than they really are. Look for things like street signs with the city behind it or flowers in the foreground with the grassy knoll in the background.Also consider shooting overhead for a bird’s eye view. Climb to the second level of a shopping mall or other multi-floor venues, and shoot down below. Zoom out, and keep your camera parallel to the ground. This will get the tops of people’s heads, which is interesting for big crowds or people in formal wear. This is particularly effective for wide shots in banquet halls for weddings or rockers at concerts. Get the muscles moving for new perspective shooting.
6. Steadier landscapes and night scenes
Tripods are helpful for nighttime and landscape photography. Bolt the point-and-shoot to the camera socket. Be careful to twist just enough for stability, but not too tight, particularly if the socket is made from plastic, which can peel if worn away from over usage.During nights, turn off the flash for some long exposures. The tripod will steady the camera. Try shooting cars zooming by on a busy city street. The long exposure will make the cars look like streaks and the light posts like starbursts.
You can consider using the tripod for landscape shots. Rotate the camera horizontally using the tripod. Take a series of photos at the same level for a 180-degree, panoramic view. If you choose to, you can use this series of photos for a post-processing stitching to create one long, wide photo.
7. Creative subject framing
To get a little more creative, try framing your subjects off center. Try depressing the shutter halfway to focus. Recompose the photo off-center, and take the shot. This should keep the focus on the subject, even if it is not at the center of frame, adding a dynamic element particularly to your portraiture photography. This should work with most point-and-shoots, but some cameras will default to the center as the point of focus. In that case, change the AF setting to “Spot” or “Tracking AF” via the menu system.8. Find some red
Look for interesting points in a landscape or street scene with a flash of red to make subjects stand out from their surroundings. Ask your portrait subject to wear a red scarf or hat or switch shirts to a red color. Just as in car colors, people are more likely to be drawn to red.9. Always be ready to take a great photo
If you are using the manual mode on your p&s, make sure you have the settings correct for the environment you are in (i.e. ISO set to 100 for broad daylight, or 800 for nighttime, aperture and shutter speed appropriate for action or still shots). If you are suddenly inspired to take a photo, or something interesting happens, be ready to capture that moment instantaneously without fumbling to change the settings.Also, it may seem obvious, but all users should remember that battery life during vacation is the key to successful travel shooting. Charge your batteries the night before your hike for the full amount of required time that your manual dictates. Most chargers have a blinking light that signals when the charge is complete. Remember that overcharging your battery can also lead to damage to your battery. Read the fine print on your camera’s battery charge times, as spelled out in your manual specifications.
10. Submit your photos for critique
There’s no better way to improve your travel photography than sharing your photos with other photographers through a network. Try submitting your favorites to Photo.net’s Photo Critique Forum or even informal person-to-person feedback. You’ll find that other photographers—novice users and professionals—have plenty of travel tips to offer.Conclusion
Travel time is playtime and what better time to experiment with your point-and-shoot than on your vacation? Remember that a new environment means a new kind of shooting. Practice these tips prior to the trip, and then use them for live event. You might be surprised at how easy some of the techniques are. It merely requires you getting to know your point-and-shoot better to take advantage of its full feature set of manual modes and customizable settings. Beyond the camera itself, remember to mix it up a bit with varied angles. In addition to thinking about what kind of shoes to pack, consider the places of travel when deciding on what camera equipment to bring (camera bag, extra batteries, and memory card reader). A little planning can go a long way when it comes to travel photography. Using these tips can help capture you to fully capture your travels.Thursday, April 7, 2011
Look loose 10 Pounds in Photos
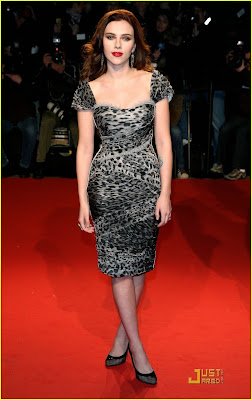
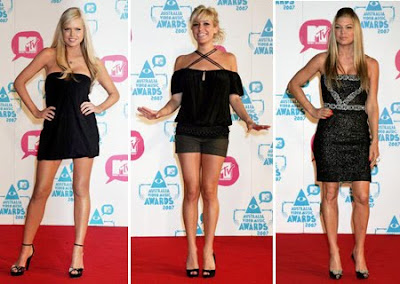
နာမည္ေက်ာ္ မင္းသားမင္းသမီးေတြ Red Carpet ေပၚမွာရို္ကတဲ႔ပံုေတြမွာ အျမဲထမ္းၾကည္႔လိုက္ရင္ လွပျပီး သြယ္သြယ္လွ်လွ်ေလးျဖစ္ေနတတ္ပါတယ္။
သည္လိုဆို ဘယ္လိုမ်ား ပိန္ေအာင္ Photo အရိုက္ခံၾကမလဲ။ အနည္းဆံုး အျမင္မွာ ၁၀ေပါင္ ေလာက္က်သြားတယ္ ထင္ေအာင္ ရိုက္လို႔ ရပါတယ္ လို႔ဖတ္ဖူး ပါတယ္။ ဒါဆိုလွ်ိဳ၀ွက္ခ်က္က ဘာမ်ားလဲ ?? Pose ပါပဲ။သည္လို ထင္ျမင္ေအာင္ ကိုယ္လံုးေပၚမွန္ေရွ႔မွာ ေအာက္ကအခ်က္ (၅) ခ်က္ အတိုင္း သတိထားျပီးလုပ္ၾကည္႔ရင္ ထူးျခားေၾကာင္းေတြ႔ရပါလိမ္႔မယ္။
- ကင္မရာခ်ိန္ထားတဲ႔ဘက္ကို ၾကည္႔တဲ႔အခါ ကိုယ္လံုးကိုလွည္႔ရာမွာ ေျခေထာက္ကိုသတိထားရပါမယ္။ ေျခေထာက္ႏွစ္ဖက္ဟာ အေ၇ွ႔ အေနာက္မ်ဥ္းျပိဳင္ ကင္မရာဘက္ကိုဦးတည္ေနရမွာျဖစ္တဲ႔အျပင္၊ ေျခႏွစ္ေခ်ာင္း ဆံုရာမွာရွိတဲ႔ေနာက္ဘက္ ေျခေထာက္အေပၚကို ကိုယ္လံုးရဲ႔အေလးခ်ိန္ကိုအားျပဳထားေပးပါ။ ခါးကိုလဲ ၃၅ ဒီဂရီေလာက္ Twist ေလးလုပ္ထားေပးဖို႔လိုပါလိမ္႔မယ္။
- ဦးေခါင္းကို ကင္မရာအေရွ႔ဘက္ကိုအနည္းငယ္ေမာ႔ျပီး ဆန္႔ထုတ္ဖို႔လိုပါတယ္။မသိမသာေလး ဆိုယံုသာ ေမာ႔ရမွာပါ ဘာျဖစ္လို႔လဲဆိုေတာ႔ ေခါင္းဟာ အေနအထားမွားသြားမယ္ဆိုခဲ႔ရင္ ေမးစိ ႏွစ္ထပ္ေပၚေနတာေပၚသြားပါလိမ္႔မယ္။ ဒါမွမဟုတ္ ေမးစိေနရာက အဆီပိုေတြျမင္သြား ပါလိမ္႔မယ္ ဒါေၾကာင္႔ အသာေလးေမာေငါ႔ ၾကည္႔လိုက္ပါ။
- ေနာက္တစ္ခ်က္က လက္ပါ။ ပံုအရိုက္ခံတဲ႔ေနရာမွာ ကိုယ္လံုးနဲ႔ လက္ေမာင္းကိုအတင္းမကပ္ထားသင္႔ပါဘူး။နည္းနည္းေလးျဖစ္ျဖစ္ ခြာျပီး အရမ္းၾကီးမေကြးလိုက္ပါနဲ႔ ၊ အရမ္းၾကီးေကြးမိခဲ႔လို႔ရွိရင္ လက္ေမာင္မွာရွိေနတဲ႔ အဆီေတြက စုေပးသလိုျဖစ္ျပီး၊ အစ္ထြက္လာႏိုင္ပါတယ္။ ျဖစ္ႏုိင္ရင္ လက္ကို တန္းလန္းၾကီးဆန္႔ထားတာထက္ နည္းနည္းေလးခြာျပီးေကြးၾကည္႔ပါ။ သိသာပါတယ္။
- အမ်ိဳးသမီးေတြရဲ႔ အခက္အခဲကေတာ႔ ပုခံုးသားေတြနဲ႔ ဗိုက္ပါပဲ။အမ်ားအားျဖင္႔ ပံုေတြမွာ ဗိုက္ကိုပိန္ခ်င္လို႔ အသက္ကိုရွိဳက္ေအာင္႔ထားတာ ေတြလုပ္တတ္ၾကပါတယ္။ မလုပ္ပါနဲ႔ ၊ဗိုက္သာပိန္သြားေပမယ္႔ ဒတ္ပံုထြက္လာလို႔ရုပ္ကိုၾကည္႔လုိက္ရင္တစ္ခုခုကို မတင္မက် မ်ိဳသိပ္ထား သလို ပံုေပါက္ေနမွာပါ။ဒါမွမဟုတ္ မသက္မသာ ပံုစံထြက္ေနပါလိမ္႔မယ္။ ဒါဆိုရင္.. ဘယ္လိုလုပ္မလဲ ကြ်န္ေတာ္တို႔ ပထမဦးဆံုး ပုခံုးႏွစ္ဘက္ ကိုေနာက္ဘက္ကို နည္းနည္းလွန္လိုက္မယ္ သေဘာက ရင္ကိုနည္းနည္းဖြင္႔လိုက္သလိုေပါ႔။ ရင္ဘတ္ပိုင္းကို ကင္မရာတည္႔တည္႔အရိုက္ခံပါ။ ဒါဆို ဗိုက္ပူေနတဲ႔ေနရာက်ဥ္းသြားတယ္လို႔ ကင္မရာမွာထင္ပါလိမ္႔မယ္။ ဒါမွမဟုတ္ ကိုယ္ကိုေဘးအနည္းငယ္ေစာင္းျပီး လက္ကိုင္အိတ္ စသည္တစ္ခုခုနဲ႔ ကြယ္ေပးထားလို႔ရပါတယ္။
- ေနာက္တစ္ခုက အျပံဳးပါပဲ။ Sports Illustrated swimsuit Cover Girl ေတြလို အျပံဳးမ်ိဳးေလးနဲ႔အရိုက္ခံခ်င္ပါသလား။ အေ၀းတစ္ေနရာ ကိုၾကည္႔ေနလိုက္ပါ ျပီေတာ႔ ကင္မရာခ်ိန္ထားရာဘက္ကိုလွည္႔လိုက္ပါ။ မ်က္လံုးအၾကည္႔က ကင္မရာခလုတ္ႏွိပ္ခါနီးအခ်ိန္မွာ လွစ္ခနဲ ၾကည္လိုက္ပါ။သည္အခ်ိန္မွာပဲ ျပံဳးပါ။တစ္ခ်ိန္လံုးျပံဳးျပထားစရာမလိုပါဘူး။ မရိုက္ခင္ၾကိဳျပံဳးထားတဲ႔အျပံဳးဟာ မလတ္ဆတ္ဘူး။အားမပါဘူး အသက္မ၀င္ဘူးလို႔ ေျပာၾကလို႔ပါ။သေဘာကေတာ႔ အျပံဳးကလတ္ဆက္ေနျပီး ေရခဲထိထားတဲ႔အျပံဳ(Frozen smile) မျဖစ္ေတာ႔ဘူးေပါ႔ေနာ္။
အခန္းတခါးပိတ္ မွန္ေရွ႔ နည္းနည္းက်င္႔လိုက္ရင္အဆင္ေျပသြားမွာပါ။
ဗိုက္ေခါက္ေ၇ွ႔မွာ ပိုက္ဆံအိတ္ကာတာ။ လက္ေမာင္းအက် ကို ပ၀ါေလးကာတာ၊ လွိ်ဳကိုင္ထားတာေတြကလဲ လူကိုတနည္းအားျဖင္႔ပိန္တယ္ လို႔ထင္ေယာင္ေအာင္ ျပဳလုပ္ေပးပါတယ္။
Rgds,NaingHL
Wednesday, March 2, 2011
Superb Skin Airbrush Technique
Airbrushing Skin Photoshop Tutorial
Step 1
Open the photo into Photoshop. For this tutorial, try to use a high resolution image where you can see the skin texture.Step 2
Create a duplicate layer and put it into a group. To do this, press Ctrl+J to duplicate the layer then Ctrl+G to place the new layer into a group. Name the group "Airbrush" and the layer "Blur". To retouch the skin, there will be two layers in the Airbrush group. The first layer we’ve created (the Blur layer) will be used to blur the skin. After that, we’ll add another layer to restore the natural skin texture.Step 3
Have the Blur layer selected. To blur this layer, use the Surface Blur filter. This filter blurs like the Gaussian Blur filter except it can retain edge detail. We’ll need to blur the layer so that the skin is smoothed and somewhat blurry without having the edgesHere’s what my image looks looks like after the Surface Blur filter. Your image should look similar with details such as the eye intact. If the eye becomes blurry, your settings are too strong. Undo and redo the Surface Blur filter with a lower setting.
Step 4
Create a new layer and move it above the Blur layer. Name this layer "Texture" and change the blend mode to Hard Light. This layer, as the name states, will be used to add a slight texture to the skin and also adjust the skin tonality.The texture created in this layer will contribute to the final results very minimally – the difference can only be easily seen zoomed in on high resolution images and varies from image to image. Even though the result is very minimal, it ensures that no area of the skin looks too smooth or plastic.
Below is an example of this. On the left, the image looks like a solid color, also known as plastic skin. The image on the right has a slight noise pattern to make the skin look more realistic.
Step 5
Make sure that you have the "Texture" layer selected. With that layer selected, press Shift+F5 or choose Edit > Fill. In the Fill tool, set the settings according to the image below. This will fill your layer with a 50% gray color.Step 6
Open the Add Noise filter from the Filter > Noise menu. Enter in the settings shown in the image below. This will add some noise to the image that will prevent skin from looking plastic. It may look a little too sharp, but in the next step, we’ll fix this with a Gaussian Blur filter.Step 7
Choose Filter > Blur > Gaussian Blur. Blur the layer by 1 pixel.Step 8
Now we’ll temporarily tint the color of this layer. First, select the Eye Dropper tool from the toolbar. Sample an area on the skin that appears to be the average skin color. You don’t have to be very precise because we will tune the color later in the tutorial. In the Color palette, click on the flyout menu below the close window button and select HSB sliders. We’ll need to see the HSB values for the next step.Step 9
Open the Hue/Saturation tool by pressing Ctrl+U or choosing Image > Adjustments > Hue/Saturation. Check the Colorize option and adjust the hue, saturation, and lightness values to match the HSB values from the color we sampled in the previous step. For the brightness, set this toStep 10
Select the Airbrush group in the Layers palette and add go to Layer > Layer Mask > Hide All. This will create a layer mask filled with the color black that will hide the group. With this layer mask, we’ll paint the areas were we want the skin to appear. Otherwise, this skin airbrushing effect will appear on the entire image.Step 11
First, press D on your keyboard to set the foreground and background colors to the default black and white. Select the Brush tool and apply the settings below.Zoom in to 100% and paint over the skin. The parts that you paint will appear smoother with a different skin tone. Don’t worry if the skin tone doesn’t look correct. This is because we didn’t pick the correct color when we used the Hue/Saturation to tint the "Texture" layer. It’s too difficult to do that without a preview, so we’ll fix that later.
When painting, you’ll need to change the brush size and hardness frequently. It would be tedious to always access the brush option menu to do this so take this as an opportunity to use hot keys. Use the following hot keys to help you with modifying the brush size and hardness:
- Decrease brush size: [
- Increase brush size: ]
- Decrease brush softness by 25%: Shift + [
- Increase brush softness by 25%: Shift + ]
When you’re done, your layer mask should have the skin areas in white and the skin should look smooth.
Step 12
Now we’re going to fix back the color and tone of the skin as we mentioned earlier in the tutorial. Select the "Texture" layer and press Ctrl+U to access the Hue/Saturation tool. Alter the settings to get a natural looking skin tone.- The Hue setting is usually correct. I increased it by 10 to add more yellow to it to make the appearance of the red areas less visible.
- The Saturation setting usually needs to be reduced greatly. Adjust this until the skin tone looks natural but not too pale.
- The Lightness setting requires slight modification. A slight change in the lightness will create big difference in how the skin blends in with the image. As you adjust the setting, you will see how sensitive this setting is. Even though it requires high precision, it is easy to tell when it is the correct setting. If it is off, it will look really off. If it is at the correct setting, it will look a lot more natural.
Step 13
Finally, we’re going to restore the skin details. Choose Image > Apply Image. Use the settings below.The reason why we’re applying data from the Red channel is because it contains the least skin imperfections. The image below shows the difference in the channels. The red channel hides many of the skin imperfections that are visible in the green and blue channel.
Final Results
Here’s the final results after applying this airbrushing technique. In the image below, you can see how smooth the skin looks. Because the image below has been downsized to fit into this tutorial, it may look slightly plastic. However, when zoomed in, the texture is clearly visible.This is a crop of an area zoomed in 100%. The tiny skin bumps are still visible. Even near the bottom right of the image, it still looks natural because of the "Texture" layer that we added. Without that layer, that area would appear as a solid color with no noise.
And as usual, here are the before and after images.
Friday, February 18, 2011
Studio Lighting for Headshots – Tutorial
For this tutorial, I will focus on the ‘classic’ headshot.
Beautiful headshots can be produced with three lights and a reflector.
Place you key light, preferably in a VERY large umbrella, almost directly in front of and well above your subject. You will bounce the light into the umbrella, NOT shoot through it.
Place a large white or silver reflector at a 45 degree angle directly under the subjects face, low enough not to be in the photo. This will bounce fill light under the subject’s chin and cure a myriad of ills, such as double chins and soft jawlines. It also adds an extra little ‘kick’ of liveliness to the image.
Place yourself slightly higher than the subject aiming down. Shoot with longer focal length lenses, in the 85-150mm range. I prefer to shoot against either a dark gray or black background. And there you have it – the basic headshot.
Source: http://www.studioonashoestring.com/854/studio-lighting-for-headshots-tutorial/
On location portrait lighting setup
Portrait of swedish actress Nina Zanjani. All the red household objects go well with the warm light from the lamp. The key light is from the strobe though.
White fashion photography on the beach (Reference)
White fashion photography on the beach
Norwegian photographer Eivind Røhne tells us about about this fashion photography lighting:
As a fashion photographer shooting a lot of stuff outdoors, I often prefer to use the soft light in the shadows. And my clients as well. Then we shape and tweak the light to get it how we want it to look. We use reflectors, speedlights or mobile studio lighting kits. Or maybe all of them. But sometimes we want a different look and feel to the fashion photographs we make.
This fashion magazine client of mine often likes to have a white clothing series in their editorials every year. And this white stuff we like to do in direct sunlight. This time it was on a beach in Sardegna/Sardinia in Italy. We shot a complete editorial quite fast during what usually is considered lunch time; harsh sunlight with lots of shadows. Fortunately we didn’t have a clear blue sky, but we got some clouds that gave us a little bit of texture in the background.
I immediately saw that this could be a cool before and after picture because of the tremendous effect of the reflector. So I asked the editor of the magazine, Mary-Ann – also known as “The Grey Card Lady”, to just tilt the reflector away on one of the shots. She’s a wonderful lady, and did what I asked without asking why, and then we kept on shooting. She was holding a 1×2 meter California Sunbounce half silver/gold reflector a couple of meters away from the model, directing the harsh sunlight back towards the model. And as you can see, a reflector this size can literally light up the whole place. The light was so intense that even the professional model had a hard time looking in its direction for too long without short breaks.
I had taken a few test shots as well as a reading with my Sekonic handheld meter, to get the exposure right so that I would still have some texture in the sky, and a perfect exposure on the models skin and white clothes. Being careful not to lose those whites! Both of these shots here where shot at f/8 and 1/100 second and ISO 50 on a medium format digital Hasselblad with a 210mm lens.
Amazing what a single reflector can do to light up your life!
Cheers!
Source: http://lightingforphoto.com/page/2/
Saturday, February 12, 2011
အစားအေသာက္လွလွေလးျဖစ္ေအာင္ ရိုက္ၾကရေအာင္ (၁)
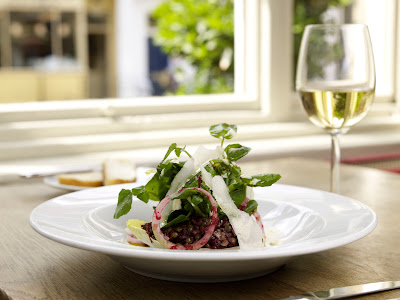
Food Photography ဆိုတဲ႔ အစားအေသာက္အလွပံုေတြကို ဘယ္လိုလွေအာင္ရိုက္ၾကမလဲလို႔
ကြ်န္ေတာ္လိုက္ရွာျပီး စုစည္းမိလိုက္ပါတယ္။ လြယ္လဲလြယ္ကူမယ္ လူတိုင္းလဲ ကင္မရာအေသးေလး ေတြနဲ႔ ပါ ပံံုလွလွေလးေတြ ထြက္ေအာင္ ရိုက္ဖို႔အဆင္လဲ ေျပေစေအာင္ေပါ႔။ ဟိုစပ္စပ္ သည္စပ္စပ္ေလးေတြစုျပီး ေရးထား တာျဖစ္တဲ႔အျပင္ အလြယ္ျဖစ္ေအာင္ေရးထားလို႔ အေသးစိတ္ လိုအပ္တဲ႔အခ်က္ေတြ ရွိေနဦးမွာျဖစ္ပါတယ္။ Tips ေလးေတြ သေဘာအေနနဲ႔ပဲ ကြ်န္ေတာ္ေရးလိုက္ရပါတယ္။
အစားအေသာက္ ပံုေတြကိုရိုက္တဲ႔အခါမွာ အေကာင္းဆံုး အလင္းေရာင္ ေပးစနစ္ကေတာ႔ သဘာ၀ အလင္းေရာင္ျဖစ္ပါတယ္။ သဘာ၀အလင္းေရာင္ တိုက္ရိုက္က်ေနတဲ႔ ေနရာမွာ ရိုက္ရင္ ပံုထြက္ေတြဟာ ပိုျပီးသဘာ၀ဆန္တယ္လို႔ ေျပာၾကပါတယ္။ အထူးသျဖင္႔ ျပတင္းေပါက္ နဲ႔နီးတဲ႔ေနရာမွာ ရိုက္သင္႔ပါတယ္။ ျပတင္းေပါက္ကေန က်ေနတဲ႔အလင္း အထူးသျဖင္႔ မနက္ခင္းအလင္းေရာင္ဟာ စူးရွလို႔ မနက္ခင္း အလင္းေရာင္နဲ႔ဆို ပံုေလးေတြ ပိုလွေနတတ္ပါတယ္။ တျခားနည္းလမ္းတစ္ခုအရ Flash ေတြကို Bounced off လုပ္ျပီးရိုက္မယ္ဆိုလဲ ပံုထြက္ေကာင္းတယ္လိုဆိုုပါတယ္။ အစားအေသာက္အေပၚ ကိုက်ေနတဲ႔အလင္းဟာ ၄၅ ဒီဂရီေလာက္ ေစာင္းက်ေနတာမ်ိဳး ဆိုေကာင္းမယ္လို႔လဲ ေျပာထားတာေတြ႔ရပါတယ္။ အစားအေသာက္ပံုေတြ ကိုရိုက္တဲ႔အခါဆိုရင္ျဖင္႔ ေရျပင္ညီ နဲ႔အညီရိုက္တာရွိသလို ေနာက္တစ္မ်ိဳးက ေရျပင္ညီ ရဲ႔အထက္ အေပၚအနည္းငယ္ကေန ရိုက္သင္႔တယ္လို႔လဲ အၾကံေပးထားတာ ကြ်န္ေတာ္ဖတ္ရပါတယ္။ ဘာအတြက္လဲဆိုေတာ႔ ပံုထဲမွာ အစားအေသာက္အရိပ္ေလးလဲပါလာေတာ႔ အျမင္တစ္မ်ိဳးျဖစ္တာေပါ႔ခင္ဗ်ာ။
ကင္မရာ အေသးေလးေတြနဲ႔ Flash ထည္႔ရိုက္တဲ႔အခါမွာ ပံုေတြဟာ ျဖဴေဖြးထြက္လာတာေတြ။ အေသးစိတ္မျဖစ္တာေတြ ၀ါးေနတာေတြရွိတတ္ၾကပါတယ္။ ဖလက္ခ်္ကို ဒဲ႔ခ်ိန္ျပီးရိုက္လိုက္တဲ႔အတြက္ ျဖဴေဖြးထြက္သြားေကာ။ ကင္မရာမွာဖလက္ခ်္က တပ္ထားတာ ဒဲ႔မခ်ိန္လို႔ျဖစ္လိုလုပ္မလဲဆို .မဟုတ္ဘူးခင္ဗ် ကြ်န္ေတာ္ဆိုလိုခ်င္တာက တည္႔တည္႔ရိုက္တာပါပဲ ဒါေပမယ္႔ တစ္္ရွဴးအျဖဴစ ခပ္ပါးပါးေလးကို ဖလက္ခ်္ေရွ႔မွာ ခံျပီးေတာရိုက္ၾကည္႔ပါ အစားအေသာက္ေတြ အေပၚအလင္းေရာင ္ဖ်ာက်တာ ပိုလွလို႔ ပံုထြက္ေလးေတြ ေကာင္းလာမွာပါ။ ကြ်န္ေတာ္႔သူငယ္ခ်င္း တစ္ေယာက္ကေတာ႔ ဓာတ္မီးအျဖဴ ကိုတစ္ရွဴး စ ေလးခံျပီး မီးအေနနဲ႔ထပ္ေပးျပီး ရိုက္တယ္ခင္ဗ် ေန ည ခြဲျခားသတ္မွတ္ထားတာမရွိပါဘူး။ လိုအပ္တယ္လို႔ ခံစားမိလို႔ ေန႔လည္ ဘက္ရိုက္လဲျဖစ္တာပါပဲ။ တစ္ရွဴးရဲ႔ အနီးအေ၀းအကြာအေ၀း ေပၚမူတည္ျပီး အလင္းဖ်ာမွဳ႔ ဟာ ေျပာင္းလဲလာမွာပါ.။ စားပြဲတင္ စာၾကည္႔မီး ကိုအသံုးျပဳျပီးလဲရိုက္လို႔ရပါတယ္။ကြ်န္ေတာ္ စားပြဲတင္မီး ကိုအသံုျပဳျပီး ပံုေတြအမ်ားၾကီးရိုက္ၾကည္႔ခဲ႔ဘူးပါတယ္။ စိတ္ၾကိဳက္လဲျဖစ္ပါတယ္။ ကင္မရာနဲ႔ ညဘက္ေတြ ရိုက္တဲ႔အခါမွာ ပံုေတြ၀ါးေနတာေတြ ရွိတတ္ပါတယ္။ ေနာက္ လူျဖစ္ေစ ဘယ္အရာမဆို ႏွစ္ထပ္ျဖစ္ေနတာတို႔ မၾကည္လင္ မျပတ္သား တာတို႔ရွိၾကပါတယ္။ ဘာလို႔ အဲ႔လိုျဖစ္ရပါသလဲ ? ကြ်န္ေတာ္တုိ႔လက္ေတြက လွဳပ္ေနလို႔ပါ။ သည္ဟာကို လတ္တေလာ နည္းလမ္း၂ခုနဲ႔ ေျဖရွင္းလို႔ရပါတယ္။ ပထမတစ္နည္းက ထြိဳင္ေပါ႔ ဆိုတဲ႔ သံုးေခ်ာင္းေထာက္ ကိုသံုးတာပါပဲ။ သံုးေခ်ာင္းေထာက္ဟာ အေသးေလးေတြလဲရွိပါတယ္။ လက္ကိုင္ ဖုန္းအရြယ္သာသာေလးေတြပါ။ သယ္ရလြယ္ပါတယ္။ ေနာက္ဒုတိယနည္းက ကင္မရာအေတာ္မ်ားမ်ားမွာပါတဲ႔ ISO Setting ဆိုတာရွိပါတယ္။ အဲ႔သည္႔ ISO Setting ကို တင္ရိုက္ေပးပါ။ တင္ရိုက္တယ္ဆိုတာက 100 ကေန 200, 300, 400,800 ,1600 စသည္ျဖင္႔ပါ။ သည္ေနရရာမွာ သတိထားရမယ္႔ အခ်က္တစ္ခုက ISO တင္လာတာနဲ႔အမွ် Noise ဆိုတဲ႔ျဗဳပ္ေတြ ထလာတတ္ပါတယ္။ သတိျပဳရပါမယ္။ကြ်န္ေတာ္တို႔ လက္ေတြမွာ သတိမထားမိတဲ႔ လွဳပ္ခပ္မွဳ႔ေလးေတြရွိပါတယ္။ လက္ကိုဘယ္လိုပဲျငိမ္ေအာင္ကိုင္ထားထား ပံုထဲမွာ လွဳပ္သြားတယ္ လို႔ေျပာၾကပါတယ္။ အဲသည္ဟာက ေတာ႔ လက္ကိုဘယ္ေလာက္ ျငိမ္ေအာင္ထားထား ခလုပ္ ကိုႏွိပ္လိုက္တဲ႔ အခ်ိန္မွာ လွဳပ္သြားတာကိုး။ ဒါေၾကာင္႔မို႔ သံုးေခ်ာင္းေထာက္သံုးရင္ပဲျဖစ္ျဖစ္၊ သည္အတိုင္းလက္လြတ္ အစားအေသာက္ေတြကိုရိုက္ရင္ပဲျဖစ္ျဖစ္ Salf-timer 2 sec 5 sec စသည္ျဖင္႔ေပးျပီး ၇ိုက္ၾကည္႔ေပးပါ။ထူးျခားလာတာေတြ႔ရပါလိမ္႔မယ္။
NaingHL


